When I first started making "Find It" jars with my students, I collected baby food jars for each of my kiddos so they could take one home with them. The positive was that I could always gather a bunch of baby food jars and they were really inexpensive...and in fact FREE. Now I'm not a mom, but I think that perhaps baby food doesn't come in jars anymore or at least the moms in my building do not buy baby food in jars. I have had a lot of difficulty getting my hands on the quantities that I need so this summer, I decided to go another route. I decided to see if I could purchase "jars" and while I was at it, I wanted plastic in case of those pesky falls caused by clumsy hands. This is what I came up with and I am really liking the solution. Although they are about $1.50 each, they are so well worth it in my opinion.
In addition to the bottles/jars, you need alphabet letter beads. You can use one type or more than one type. This summer, I lucked out and found some beads at The Dollar Tree, so I wasn't shy with my purchasing there, as I've never found them so inexpensively. I still have some leftovers from previous years, so I will use those as well. When using the letter beads, I want each student to have at a minimum, one of each letter in the alphabet. But in edition, I have them spell out their name in beads and I include a bunch of extra letter beads that they did not know based on their initial letter screening assessment. That way they will learn the letters that are important to them (their name letters) and the letters that are important to me (the ones they do not recognize). If you are not able to find letter beads at your local dollar store, you can always find them at your local craft store. And just a side note....beads are usually capital letters, not lowercase, at least that's what I have found.
To fill up the jar the rest of the way so they look like an authentic "Find It" Game, you need Ice Cream Sprinkles. I'm from Ohio and we called them Jimmies growing up. Although perhaps Jimmies meant either the chocolate only or the rainbow only. I'm not 100% positive. Anyway, I purchased mine awhile back but they came from Gordon Food Service in 25 ounce jars. But I have since found them online for cheaper. And I would use what I needed and save the rest for the following year. I figure if they are expired, it's no big deal as we are not eating them right?
I also include a shiny penny in each jar. I tell my students that is for good luck. For whatever reason, they really like the idea.
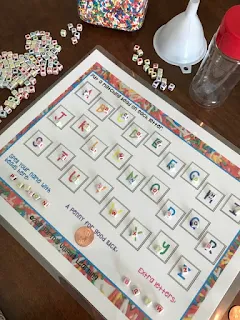
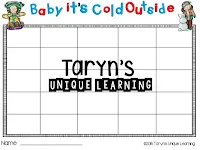
I began using whatever alphabet strips I had in my room when students would sort through the letter beads. They were encouraged to find a bead that matched each of the 26 letters. But I have since made a fun sorting sheet just for this activity and occasion. I printed them on card stock and laminated them on my personal laminator, so they are extremely durable and will be good to use in years to come. If you would like to download this SORTING SHEET FREEBIE, you are more than welcome to do so by clicking on the link below.
Once your students have found all the letters you require or suggest, you can use a funnel and start pouring in the sprinkles into the jar. Mix in the beads so they are spread throughout the layers of sprinkles, alternating sprinkles and beads, as well as the penny. Leave a little space at the top of the jar so the sprinkles and beads can rotate through the jar. And this is what the final product will look like.
So good luck with your project. If you use some different materials, I'd love to hear how you adjust this activity to meet your needs. Comment below and let me know how it goes.
And for more great letter and sound activities, please check out the link up below so you can see what some of my favorite TPT teacher author's have up their sleeves.
Until Next Time,

